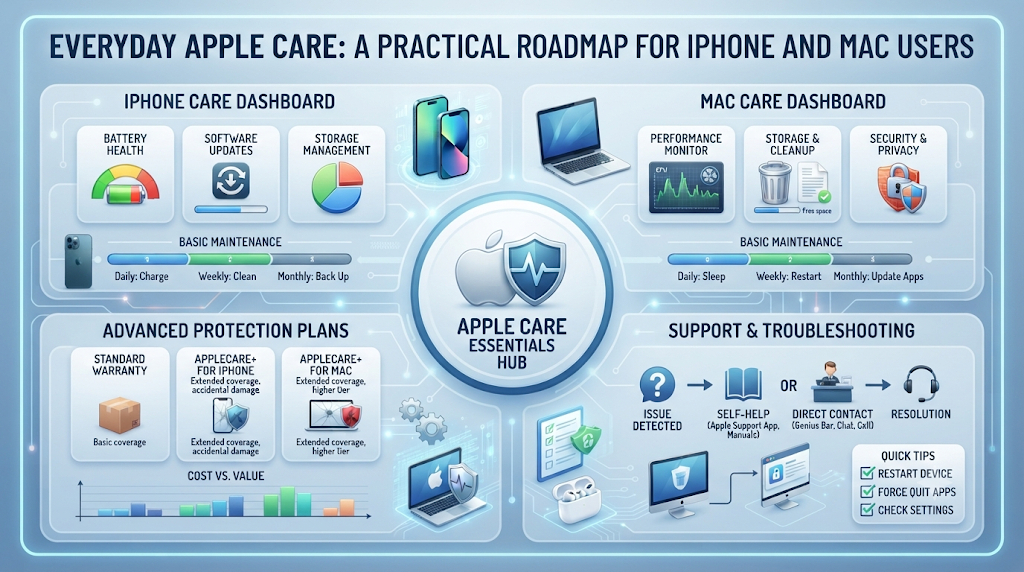
Owning an Apple device should feel effortless, yet most people hit a wall the moment a major update drops or a new phone arrives in the mail. You suddenly wonder which settings actually matter, how to move years of memories without losing a single photo, or why your phone refuses to stay online. At Osnivo, we approach Apple technology from a simple, human perspective: you do not need to be an engineer to keep your devices fast, safe, and reliable.
Rather than throwing technical jargon at you, this handbook treats your iPhone and Mac like everyday companions. We will walk through real-world situations—from checking iOS 27 compatible iPhones before an upgrade to recording a quick tutorial on your Mac—using plain, clear steps anyone can follow.
Why a Simple Routine Makes Your Apple Devices Last Longer
Think of your iPhone, iPad, and Mac as a connected household rather than separate gadgets. Each device runs software built specifically for how you hold and use it:
- iOS runs your iPhone, balancing pocket-sized speed with strict privacy controls.
- iPadOS powers your iPad, giving you extra room for split-screen work and handwriting.
- macOS drives your MacBook or desktop Mac, handling heavy multitasking and file management.
- watchOS, tvOS, and visionOS extend that same experience to your wrist, living room TV, and spatial headset.
Everything ties back to one login: your Apple Account. When you keep your software current and your account locked down, your photos, notes, and passwords flow quietly between screens in the background. When you skip basic upkeep, small glitches pile up fast.
Checking Hardware Limits Before You Upgrade
Apple supports its hardware longer than almost any other tech company, yet every device reaches a point where new software demands faster chips. Newer operating systems rely heavily on built-in neural processors to power smart on-device features, which older hardware simply cannot run without slowing down.
Finding Out Which Devices Support iOS 27
Before tapping download on a big release, take thirty seconds to verify iOS 27 compatible iPhones. Apple bases eligibility on the processor inside your phone rather than how much storage you bought.
Here is how to check your exact model in seconds:
- Tap Settings on your home screen.
- Select General, then choose About.
- Read the Model Name entry near the top of the screen.
Remember that getting the update does not always mean getting every single visual bell or whistle. Older supported phones receive crucial security fixes and core design updates, while specialized Apple Intelligence tools remain reserved for newer chips.
Verifying Support on Desktop and Laptop Macs
The exact same rule applies to your computer. Checking the list of macOS 27 compatible Macs saves you from spending an afternoon troubleshooting a failed installation. Modern macOS releases are built around Apple silicon processors (the M1, M2, M3, M4, and newer chip families), leaving older Intel-powered Macs behind.
To inspect your Mac’s hardware:
- Click the Apple icon in the top-left corner of your display.
- Choose About This Mac.
- Check the processor line and memory amount listed in the summary box.
| What to Check | Why It Matters | Where to Look |
| Chip Generation | Decides if your device qualifies for the new OS | Settings > General > About or About This Mac |
| Free Disk Space | Gives the installer room to unpack files safely | Settings > General > iPhone Storage or System Settings > General > Storage |
| Memory (RAM) | Controls whether advanced AI tools run smoothly | Your device’s original tech specs sheet |
Should You Install Major Updates on Day One?
Every time a major software version arrives, the same debate starts: should I update to iOS 27 immediately, or hold off? Instead of guessing, match your timing to how heavily you depend on your phone each day.
When Updating Right Away Makes Sense
- You want immediate protection against newly patched security flaws.
- You enjoy testing fresh messaging, battery, and home screen tools right away.
- You use standard Apple apps and popular social or streaming platforms.
When Waiting Two Weeks Is Smarter
- You rely on specialized banking, medical, or workplace apps that sometimes lag behind Apple’s release schedule.
- You want to avoid minor battery drain or Bluetooth hiccups that Apple usually fixes in a quick
.0.1follow-up patch.
A Balanced Habit: Back up your phone on launch week, give developers ten to fourteen days to push app updates, and then install the new system cleanly over home Wi-Fi.
Protecting Your Memories: How to Back Up an iPhone
Picture dropping your phone in a puddle ten minutes before a flight. If you know how to back up an iPhone properly, that accident becomes a minor inconvenience instead of a permanent loss of family photos and messages. You have two dependable ways to save your data.
Option A: Automatic Wireless Backups with iCloud
iCloud backs up your phone quietly every night while it charges and connects to Wi-Fi.
- Open Settings and tap your name at the top.
- Tap iCloud, then scroll down and select iCloud Backup.
- Switch on Back Up This iPhone.
- Tap Back Up Now whenever you want an immediate snapshot before changing settings.
Keep in mind that Apple’s free 5 GB tier fills up fast. If you take lots of videos, upgrading your iCloud+ storage or using a computer backup prevents incomplete saves.
Option B: Full Encrypted Backups on a Computer
If you want a complete copy stored right on your own hard drive without paying monthly cloud fees, use your Mac or Windows PC.
- Plug your iPhone into your computer with a quality USB cable.
- Open Finder on a Mac (or the Apple Devices app on Windows) and click your iPhone in the sidebar.
- Under General, choose Back up all of the data on your iPhone to this Mac.
- Tick the Encrypt local backup box and pick a password you will never forget—encryption locks in your saved website passwords, Health metrics, and Wi-Fi logins.
- Click Back Up Now and let the progress bar finish before unplugging.
Unboxing Day: How to Set Up a New iPhone Smoothly
Setting up a fresh device feels much calmer when you lay both phones on a table with a charger nearby. Follow this straightforward path for how to set up a new iPhone without forgetting crucial accounts:
- Wake the Phone: Hold the side button until the Apple logo glows, then pick your language and region.
- Start Quick Start: Bring your old iPhone close to the new one. When the setup card pops up on your old screen, tap Continue and hold your old phone’s camera over the swirling blue pattern on the new display.
- Join Wi-Fi: Pick your home wireless network and type in the password.
- Set Up Biometrics and a Passcode: Scan your face for Face ID (or your finger for Touch ID) and create a strong six-digit passcode.
- Move Your Stuff: Select Transfer from iPhone to copy apps and files directly between phones, or tap Download from iCloud if your old phone is no longer working.
- Sign In to Your Apple Account: Log in so your messages, subscriptions, and Find My tracking wake up automatically.
- Pick Your Preferences: Choose your display zoom and Siri settings—nothing here is permanent, so you can tweak anything later.
Switching Sides: Transfer Data from Android to iPhone
Moving away from Android used to mean manually emailing photos to yourself and retyping phone numbers. Today, Apple’s free Move to iOS app lets you transfer data from Android to iPhone over a direct wireless link.
Quick Prep Checklist
- Connect both phones to wall chargers so neither battery dies mid-transfer.
- Turn on Wi-Fi on your Android handset.
- Download Move to iOS from the Google Play Store onto your Android phone.
- Confirm your new iPhone has enough storage space to hold your old camera roll.
Step-by-Step Switch
- Start setting up your new iPhone until you land on the Transfer Your Apps & Data screen.
- Tap From Android to generate a one-time six-digit or ten-digit pairing code.
- Launch Move to iOS on your Android phone, agree to the prompts, and type in that pairing code.
- Tap Connect on your Android screen when your iPhone creates a temporary private Wi-Fi hotspot.
- Check the boxes for everything you want to bring over—Contacts, Message History, Camera Roll, Calendars, and WhatsApp data—then tap Continue.
- Leave both phones sitting side by side until the iPhone confirms the transfer is complete, then tap Done on Android.
Good to Know: Free apps that exist on both platforms will download automatically from the App Store, while paid Android apps must be repurchased on iOS.
Making Your Phone Work Smarter: An Everyday iPhone Settings Guide
Default factory settings try to please everyone, which often leaves your screen too bright and your lock screen crowded with noisy alerts. Use this practical iPhone settings guide to tailor your phone to real daily life:
- Tame Constant Alerts: Open Settings > Notifications > Scheduled Summary to group shopping promos and social media pings into two quiet daily digests instead of constant buzzes.
- Stretch Your Battery Naturally: Go to Settings > General > Background App Refresh and switch it to Wi-Fi only, or turn it off for apps that do not need to refresh while sitting in your pocket.
- Customize Your Swipe-Down Controls: Swipe down from the top-right corner to open Control Center, tap the + button in the upper left, and place tools like Low Power Mode, Screen Recording, and Timer right where your thumb reaches easily.
- Choose Your Favorite Default Apps: Visit Settings > Apps > Default Apps if you prefer opening links in Chrome or Firefox or reading email in Gmail instead of Apple’s built-in apps.
- Protect Your Eyes at Night: Open Settings > Display & Brightness > Night Shift and schedule warmer screen colors after sunset so late-night reading feels easier on your eyes.
Locking Down Your Privacy: iPhone Security Settings Checklist
Your phone holds your bank logins, private family photos, and two-step verification codes. Run through this iPhone security settings checklist once to close the easiest doors thieves and data brokers exploit:
- Turn On Stolen Device Protection: Open Settings > Face ID & Passcode, type your passcode, and switch on Stolen Device Protection. If someone watches you type your passcode in public and steals your phone, they still cannot change your Apple Account password or view saved logins without your actual face or fingerprint.
- Confirm Find My Is Active: Tap Settings > [Your Name] > Find My > Find My iPhone and turn on Find My iPhone, Find My network, and Send Last Location so you can locate your phone even if its battery runs out.
- Stop Cross-App Ad Tracking: Head to Settings > Privacy & Security > Tracking and turn off Allow Apps to Request to Track.
- Trim Location Access: In Settings > Privacy & Security > Location Services, switch weather, shopping, and food apps from Always to While Using the App.
- Hide Sensitive Lock Screen Previews: Go to Settings > Notifications > Show Previews and pick When Unlocked so stranger eyes cannot read incoming bank codes on a locked screen.
- Automate Rapid Security Patches: Visit Settings > General > Software Update > Automatic Updates and enable Security Responses & System Files.
Fixing Dropouts When an iPhone Won’t Connect to Wi-Fi
Few things disrupt a workday faster than watching your browser spin endlessly while everyone else online seems fine. If your iPhone won’t connect to Wi-Fi, work through these fixes from simplest to strongest.
1. Rule Out Router and Toggle Glitches
- Open Settings > Wi-Fi and verify that Wi-Fi is switched on and Airplane Mode is off.
- Walk into the same room as your router to check if thick walls or distance are blocking the signal.
- Unplug your wireless router from the wall for 30 seconds, plug it back in, and wait two full minutes for the lights to settle.
2. Refresh a Saved Network
Sometimes your phone clings to an outdated network password or broken IP address.
- Tap Settings > Wi-Fi.
- Tap the blue i icon beside your Wi-Fi name.
- Choose Forget This Network and confirm.
- Tap the network name again and re-enter the password carefully.
3. Pause Background VPN Apps
If you run a third-party VPN app, an expired session can quietly block all internet traffic. Open Settings > General > VPN & Device Management and toggle the VPN off temporarily to see if web pages load normally again.
4. Reset Network Settings (Clean Slate)
When nothing else works across multiple Wi-Fi networks, clear your phone’s network memory:
- Open Settings > General > Transfer or Reset iPhone.
- Tap Reset, then select Reset Network Settings.
- Confirm with your passcode.
Important Note: Your photos, texts, and apps stay completely safe, though you will need to re-type your saved Wi-Fi passwords and reconnect Bluetooth headphones afterward. If the Wi-Fi toggle itself stays grayed out and unclickable, schedule a hardware check with Apple Support.
Capturing Your Screen: QuickTime Player Screen Recording on Mac
You do not need to buy or download extra software just to show a coworker how a website works or save a quick walkthrough. Built right into macOS, QuickTime Player screen recording Mac tools give you crisp, reliable video in seconds.
How to Record Your Mac Display
- Launch QuickTime Player from your Applications folder (or press Command + Space, type
QuickTime Player, and hit Return). - Click File > New Screen Recording in the top menu bar (or press Control + Command + N).
- Use the floating toolbar at the bottom to pick Record Entire Screen or Record Selected Portion (drag the dashed box around the exact app window you want to capture).
- Click Options to choose where the file lands (such as your Desktop) and select your microphone if you want to talk viewers through your steps.
- Hit Record to start filming.
- Click the small Stop icon in the top-right menu bar when you finish. Your recording opens immediately so you can trim the start or end under Edit > Trim.
Four Habits That Cause Needless Headaches
Even longtime Apple fans fall into a few common traps. Steering clear of these habits saves hours of frustration:
- Updating on a Nearly Full Drive: Trying to install an iOS or macOS upgrade with only 2 GB of free space often causes stalled progress bars. Keep at least 10–15 GB clear before updating.
- Deleting Photos Without Checking iCloud Sync: When iCloud Photos is turned on, deleting a picture from your iPhone wipes it from your iPad, Mac, and iCloud simultaneously.
- Using Predictable Four-Digit Passcodes: Switching from a simple four-digit PIN to a six-digit or custom alphanumeric passcode makes brute-force guessing vastly harder.
- Trusting Pop-Up “Security Warning” Profiles: Never install configuration profiles downloaded from random browser pop-ups or text links.
Practical Utilities Available on Osnivo
Whenever you want tailored answers without digging through dense technical manuals, Osnivo brings together focused tools built around everyday Apple ownership:
- Compatibility Checker & Version Compare: Check hardware support before upgrading and compare features side by side across operating system releases.
- Update Readiness Checker & Should I Update Tool: Evaluate storage headroom, backup readiness, and app stability before installing new software.
- Setup Companion & Migration Planner: Follow clear step-by-step checklists when unboxing a new iPhone or moving data over from Android.
- Settings Pathfinder & Security Checkups: Find hidden iOS and macOS toggles fast and verify that essential theft and privacy protections are switched on.
- Osnivo Fix & Community Q&A Forum: Troubleshoot Wi-Fi, battery, or syncing hiccups methodically, or ask questions in our community forum.
Frequently Asked Questions (FAQs)
1. How can I tell if my handset is among iOS 27 compatible iPhones?
Open Settings > General > About on your iPhone and read your Model Name. Match that model against Apple’s official compatibility list or Osnivo’s Compatibility Checker before starting an update.
2. Should I update to iOS 27 the very day Apple releases it?
Updating on launch day works well if you back up first and want the newest security fixes immediately. If you depend on specialized work or banking apps, waiting one to two weeks for Apple’s first minor stability patch is a smart move.
3. What is the most reliable method for how to back up an iPhone?
Combining automatic nightly iCloud Backups over Wi-Fi with an occasional encrypted computer backup on your Mac or PC gives you two independent safety nets.
4. How long does it take to set up a new iPhone with Quick Start?
Most direct phone-to-phone transfers finish in 15 to 45 minutes, depending on how many gigabytes of photos and apps you have and how fast your local Wi-Fi router runs.
5. Can I transfer data from Android to iPhone without erasing my iPhone first?
Apple’s Move to iOS tool only runs during initial setup. If your iPhone is already set up, you can either erase it (Settings > General > Transfer or Reset iPhone > Erase All Content and Settings) to use Move to iOS, or sign into Google Photos and Google Drive on your iPhone to pull files over manually.
6. Why does my iPhone show full Wi-Fi bars yet refuse to load websites?
Full bars only mean your phone is talking to your router—not that your router is connected to the internet. Unplugging your modem and router for 30 seconds usually restores the outside connection.
7. How do I check macOS 27 compatible Macs details on my laptop?
Click the Apple menu in the top-left corner of your screen and choose About This Mac to verify your Mac’s chip generation and model year against Apple’s supported hardware list.
8. Which setting matters most on an iPhone security settings checklist?
Enabling Stolen Device Protection (Settings > Face ID & Passcode) together with Two-Factor Authentication blocks thieves from locking you out of your Apple Account even if they know your screen passcode.
9. Can QuickTime Player screen recording on Mac capture internal computer audio?
Out of the box, QuickTime Player records sound from your microphone rather than internal app audio. Recording system sound directly requires pairing QuickTime with a free virtual audio driver in macOS Audio MIDI Setup.
10. Does resetting network settings erase my personal photos or messages?
No. Tapping Reset Network Settings only clears saved Wi-Fi networks, Bluetooth pairings, and VPN settings while leaving all your photos, messages, and apps completely intact.
Wrapping Up
Keeping your Apple devices running smoothly comes down to a handful of repeatable habits rather than deep technical skill. Verify hardware compatibility before major upgrades, keep a fresh backup running in the background, lock down your privacy toggles, and tackle Wi-Fi glitches one calm step at a time.
Take five minutes today to check your last backup date under Settings > [Your Name] > iCloud > iCloud Backup and verify that Stolen Device Protection is switched on. Whenever you are preparing for an upgrade, switching phones, or troubleshooting a stubborn setting, visit Osnivo for clear walkthroughs and practical tools built for everyday Apple users.
