Introduction & Overview
What is STM32?
STM32 is a family of 32-bit microcontrollers (MCUs) developed by STMicroelectronics, based on ARM Cortex-M processor cores. These MCUs are renowned for their high performance, low power consumption, and extensive peripheral set, making them a cornerstone in embedded systems for robotics, IoT, industrial automation, and consumer electronics. The STM32 family includes various series (e.g., STM32F0, STM32F4, STM32H7) tailored for specific performance, power, and connectivity needs.
History or Background
The STM32 family, introduced by STMicroelectronics in 2007, marked a significant evolution in microcontroller technology. It succeeded the earlier STR7 and STR9 families, which were based on ARM7 and ARM9 cores, respectively. The STM32 series adopted the ARM Cortex-M cores (M0, M0+, M3, M4, M7, M33, M55), offering a balance of performance, cost, and power efficiency. Over the years, STMicroelectronics expanded the STM32 portfolio with series like:
- STM32F1 (2007): First series with Cortex-M3 core, targeting mainstream applications.
- STM32F4 (2011): Introduced Cortex-M4F with floating-point unit (FPU) and DSP instructions for high-performance tasks.
- STM32H7 (2017): High-performance series with Cortex-M7, reaching up to 480 MHz for complex applications.
- STM32L0/L4 (2010s): Ultra-low-power series for battery-operated devices.
- STM32WB/WL (2018): Added wireless connectivity (Bluetooth, Zigbee) for IoT and robotics.
This evolution reflects STMicroelectronics’ focus on addressing diverse embedded system needs, with continuous updates to support advanced features like neural processing units (NPUs) in the STM32N6 series for edge AI applications.
Why is it Relevant in RobotOps?
RobotOps, the intersection of robotics and DevOps, emphasizes automation, continuous integration/continuous deployment (CI/CD), and scalable management of robotic systems. STM32 microcontrollers are pivotal in RobotOps due to:
- Real-Time Control: High-performance cores (e.g., Cortex-M7) enable precise control of motors, sensors, and actuators in robots.
- Extensive Peripherals: Support for communication protocols (I2C, SPI, UART, CAN, USB) facilitates integration with robotic components and cloud systems.
- Low Power Consumption: Essential for battery-powered robots, especially in mobile and autonomous systems.
- Scalability: Wide range of STM32 series allows developers to scale from simple to complex robotic applications.
- Ecosystem Support: Tools like STM32CubeMX and STM32CubeIDE streamline firmware development, aligning with RobotOps’ automation goals.
Core Concepts & Terminology
Key Terms and Definitions
- Microcontroller (MCU): A compact integrated circuit with a processor, memory, and peripherals for controlling embedded systems.
- ARM Cortex-M: A family of 32-bit RISC processor cores optimized for low power and cost-sensitive applications.
- Peripheral: Hardware modules (e.g., ADC, PWM, UART) integrated into the MCU for specific functions like sensor interfacing or communication.
- Flash Memory: Non-volatile memory for storing firmware and application code.
- SRAM: Volatile memory for runtime data processing.
- GPIO: General-purpose input/output pins for interfacing with external components.
- DMA (Direct Memory Access): Allows peripherals to transfer data without CPU intervention, improving efficiency.
- RTOS (Real-Time Operating System): Software for managing real-time tasks, often used with STM32 in robotics.
- STM32Cube: A software ecosystem including configuration tools (STM32CubeMX) and IDEs (STM32CubeIDE) for STM32 development.
| Term | Definition | Relevance in RobotOps |
|---|---|---|
| MCU | Microcontroller Unit – compact chip with CPU, memory, peripherals | Heart of robot control |
| STM32 | ARM Cortex-M MCU family from STMicroelectronics | Widely used in robotics |
| GPIO | General-Purpose Input/Output pins | Connect sensors, motors |
| PWM | Pulse Width Modulation | Control motor speed, servo angles |
| UART/I2C/SPI | Communication protocols | Robot sensors & peripherals |
| RTOS | Real-Time Operating System (e.g., FreeRTOS) | Real-time robot control |
| Flashing | Installing firmware on MCU | Key step in RobotOps CI/CD |
| OTA Update | Over-the-Air firmware update | RobotOps continuous delivery |
How it Fits into the RobotOps Lifecycle
In the RobotOps lifecycle (design, development, deployment, monitoring, maintenance), STM32 plays a critical role:
- Design: Select an STM32 series based on performance, power, and peripheral needs (e.g., STM32F4 for motor control).
- Development: Use STM32Cube tools to configure peripherals and generate code, integrating with CI/CD pipelines for automated testing.
- Deployment: Flash firmware onto STM32 MCUs in robots, ensuring compatibility with sensors and actuators.
- Monitoring: Leverage STM32’s communication peripherals (e.g., UART, CAN) to send telemetry data to cloud platforms for real-time monitoring.
- Maintenance: Update firmware over-the-air (OTA) using STM32’s flash memory and bootloader, aligning with DevOps practices.
Architecture & How It Works
Components and Internal Workflow
The STM32 architecture is built around an ARM Cortex-M core, surrounded by:
- CPU Core: Executes instructions (e.g., Cortex-M4 with FPU for floating-point calculations).
- Flash Memory: Stores firmware (e.g., 512 KB to 2 MB in STM32F4).
- SRAM: Handles runtime data (e.g., 192 KB in STM32F4).
- Peripherals: Includes ADC, DAC, timers, PWM, UART, SPI, I2C, USB, CAN, and Ethernet.
- Clock System: Flexible clock tree with internal/external oscillators (e.g., 8 MHz internal, 32 MHz external).
- Power Management: Supports low-power modes (Sleep, Stop, Standby) for energy efficiency.
- Interrupts (NVIC): Nested Vector Interrupt Controller for handling real-time events.
- Bus Matrix: Connects CPU, memory, and peripherals for efficient data transfer.
Workflow:
- Initialization: On power-up, the MCU initializes its clock, peripherals, and memory.
- Instruction Fetch: The CPU fetches instructions from flash memory via the bus matrix.
- Execution: Instructions are decoded and executed, interacting with peripherals (e.g., reading sensor data via ADC).
- Data Transfer: DMA handles data movement (e.g., streaming sensor data to SRAM).
- Communication: Peripherals like UART or CAN transmit data to external systems or cloud platforms.
Architecture Diagram
Below is a textual description of the STM32 architecture diagram (as images cannot be generated):
- Central Block: ARM Cortex-M core (e.g., Cortex-M4) connected to a bus matrix.
- Memory Blocks: Flash (top left), SRAM (top right), connected to the bus matrix.
- Peripheral Blocks: ADC, DAC, UART, SPI, I2C, PWM, CAN, USB, Ethernet (bottom), linked to the bus matrix.
- Clock System: Internal RC oscillator and external crystal (left), feeding the CPU and peripherals.
- Power Management: Voltage regulator and low-power mode controls (bottom left).
- Interrupts: NVIC (right) managing interrupt signals from peripherals.
- External Interfaces: GPIO pins (outer edges) for connecting to sensors, actuators, and communication modules.
        +-------------------------+
        |  Cloud / CI/CD System   |
        |  (GitHub Actions, AWS)  |
        +-----------+-------------+
                    |
              OTA / Firmware Updates
                    |
        +-----------v-------------+
        |       STM32 MCU         |
        |  +-------------------+  |
        |  |   CPU (Cortex-M)  |  |
        |  |   Flash & SRAM    |  |
        |  |   RTOS Scheduler  |  |
        |  +---------+---------+  |
        |            |            |
   +----+----+   +---+---+   +----+----+
   | Sensors |   | Actu- |   | Telemetry|
   | (Input) |   | ators |   | Logging  |
   +---------+   +-------+   +----------+
Integration Points with CI/CD or Cloud Tools
- CI/CD Integration: STM32CubeIDE supports build automation via scripts, integrating with Jenkins or GitHub Actions for automated firmware testing and deployment.
- Cloud Connectivity: STM32’s Ethernet, Wi-Fi (STM32WB), or UART interfaces connect to cloud platforms like AWS IoT or Azure IoT Hub for telemetry and OTA updates.
- Monitoring: Use STM32’s ADC and communication peripherals to send sensor data to cloud dashboards for real-time RobotOps monitoring.
Installation & Getting Started
Basic Setup or Prerequisites
- Hardware:
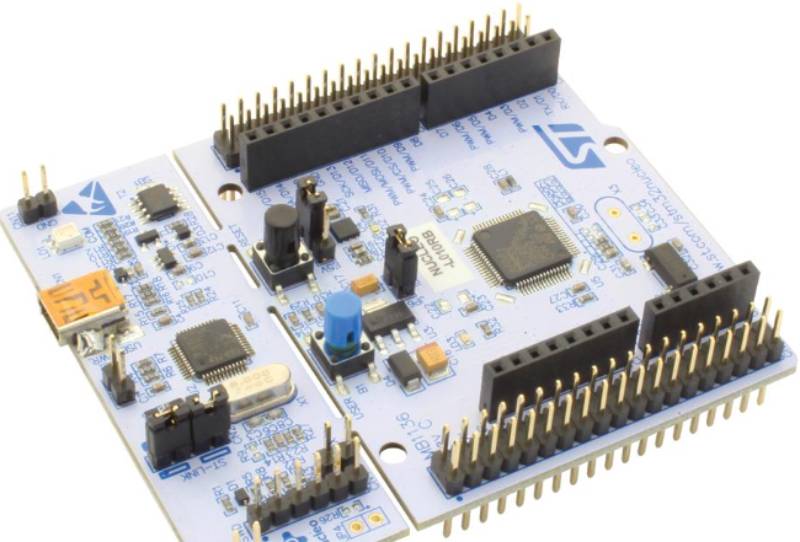
- STM32 development board (e.g., STM32 Nucleo-F446RE or STM32F4 Discovery).
- USB cable for programming and debugging.
- Sensors/actuators (e.g., DC motor, IMU) for robotics projects.
- Software:
- STM32CubeIDE (free IDE for STM32 development).
- STM32CubeMX (for peripheral configuration and code generation).
- ST-Link drivers (for programming/debugging).
- Terminal software (e.g., Tera Term) for UART communication.
- System Requirements: Windows/Linux/macOS, 4GB RAM, 2GB disk space.
- Knowledge: Basic C programming, familiarity with embedded systems.
Hands-On: Step-by-Step Beginner-Friendly Setup Guide
- Install STM32CubeIDE:
- Download from STMicroelectronics website.
- Install and configure ST-Link drivers.
- Set Up STM32CubeMX:
- Download from STMicroelectronics website.
- Open STM32CubeMX, select your MCU (e.g., STM32F446RE).
- Configure peripherals (e.g., enable UART2 for communication, GPIO for LED control).
- Generate initialization code (C project for STM32CubeIDE).
- Create a Simple LED Blinking Project:
- In STM32CubeIDE, create a new project using the generated code.
- Add the following code in
main.cto blink an LED on GPIO pin PA5:
#include "main.h"
void SystemClock_Config(void);
int main(void) {
    HAL_Init();
    SystemClock_Config();
    __HAL_RCC_GPIOA_CLK_ENABLE();
    GPIO_InitTypeDef GPIO_InitStruct = {0};
    GPIO_InitStruct.Pin = GPIO_PIN_5;
    GPIO_InitStruct.Mode = GPIO_MODE_OUTPUT_PP;
    GPIO_InitStruct.Pull = GPIO_NOPULL;
    GPIO_InitStruct.Speed = GPIO_SPEED_FREQ_LOW;
    HAL_GPIO_Init(GPIOA, &GPIO_InitStruct);
    while (1) {
        HAL_GPIO_TogglePin(GPIOA, GPIO_PIN_5);
        HAL_Delay(500);
    }
}
4. Compile and flash the code to the STM32 board using ST-Link.
5. Test the Setup:
- Connect the STM32 board to your PC via USB.
- Verify the LED blinks every 500ms.
6. Debugging:
- Use STM32CubeIDE’s debugger to step through code and monitor GPIO states.
Real-World Use Cases
Scenario 1: Autonomous Delivery Robot
- Application: An STM32F4-based delivery robot navigates urban environments using IMU sensors and motor control.
- Implementation: The STM32F446RE processes IMU data (via SPI) for attitude estimation, controls DC motors (via PWM), and communicates with a cloud server (via UART/Wi-Fi) for path planning.
- Industry: Logistics (e.g., Amazon Scout, Starship Technologies).
- Outcome: Precise navigation and real-time telemetry integration with RobotOps pipelines.
Scenario 2: Industrial Robotic Arm
- Application: An STM32H7 controls a 6-DOF robotic arm for manufacturing.
- Implementation: The STM32H743 uses CAN bus for motor control, DMA for high-speed data transfer, and Ethernet for factory automation protocols (e.g., EtherCAT).
- Industry: Industrial Automation (e.g., automotive assembly).
- Outcome: High-precision control with seamless integration into CI/CD workflows for firmware updates.
Scenario 3: IoT-Enabled Quadcopter
- Application: An STM32WB-based quadcopter with Bluetooth connectivity for remote control.
- Implementation: The STM32WB55 integrates IMU data, implements a PID controller for flight stability, and uses Bluetooth for user commands.
- Industry: Consumer Electronics (e.g., drone manufacturing).
- Outcome: Low-power, wireless control with OTA firmware updates via RobotOps.
Scenario 4: Medical Robot for Patient Monitoring
- Application: An STM32L4-based robot monitors patient vitals and sends data to a cloud platform.
- Implementation: The STM32L476 uses ADC for sensor data (e.g., heart rate), UART for cloud communication, and low-power modes for battery efficiency.
- Industry: Healthcare (e.g., telemedicine robots).
- Outcome: Reliable, low-power operation with real-time data integration.
Benefits & Limitations
Key Advantages
- High Performance: Cortex-M7 cores (up to 480 MHz) support complex robotic algorithms.
- Rich Peripherals: Extensive support for communication (CAN, Ethernet, USB) and control (PWM, ADC).
- Low Power: Ultra-low-power series (STM32L0/L4) ideal for battery-powered robots.
- Ecosystem: STM32Cube tools simplify development and integration with CI/CD.
- Scalability: Wide range of series for diverse robotic applications.
Common Challenges or Limitations
- Learning Curve: Complex peripheral configuration requires familiarity with STM32Cube tools.
- Cost: High-performance STM32 MCUs (e.g., STM32H7) are more expensive than 8-bit alternatives.
- Debugging: Debugging real-time robotic applications can be challenging without proper tools (e.g., ST-Link).
- Power Management: Incorrect configuration of low-power modes can lead to inefficiencies.
Best Practices & Recommendations
Security Tips
- Secure Boot: Use STM32’s secure boot feature (e.g., in STM32H7RS) to prevent unauthorized firmware execution.
- Encryption: Implement hardware encryption for data transmitted to cloud platforms.
- Firmware Updates: Use OTA updates with secure bootloader to protect against vulnerabilities.
Performance
- Optimize DMA: Use DMA for high-speed data transfers (e.g., sensor data to SRAM).
- Clock Configuration: Fine-tune the clock tree for optimal performance and power efficiency.
- RTOS Integration: Use FreeRTOS for task scheduling in complex robotic applications.
Maintenance
- Regular Updates: Schedule firmware updates via RobotOps pipelines to address bugs and security issues.
- Monitoring: Implement telemetry using STM32’s communication peripherals for proactive maintenance.
Compliance Alignment
- Standards: Ensure compliance with industry standards (e.g., ISO 26262 for automotive, IEC 60601 for medical).
- Certification: Use STM32H7RS for SESIP3/PSA Certified Level 3 compliance in secure applications.
Automation Ideas
- CI/CD Pipelines: Automate firmware testing and deployment using Jenkins or GitHub Actions with STM32CubeIDE.
- Cloud Integration: Use STM32WB/WL for seamless integration with AWS IoT or Azure IoT Hub.
Comparison with Alternatives
| Feature | STM32 | ATmega (AVR) | ESP32 | PIC32 |
|---|---|---|---|---|
| Architecture | 32-bit ARM Cortex-M | 8-bit AVR | 32-bit Xtensa LX6 | 32-bit MIPS |
| Max Clock Speed | Up to 480 MHz (STM32H7) | Up to 20 MHz | Up to 240 MHz | Up to 200 MHz |
| Peripherals | Extensive (ADC, PWM, CAN, Ethernet) | Basic (ADC, PWM, UART) | Wi-Fi, Bluetooth, ADC, PWM | ADC, PWM, UART, Ethernet |
| Power Consumption | Ultra-low-power modes (STM32L0/L4) | Moderate | Moderate (Wi-Fi increases power) | Moderate |
| Ecosystem | STM32Cube, Nucleo boards | Arduino, AVR Studio | ESP-IDF, Arduino | MPLAB X, Harmony |
| Cost | Medium to High | Low | Low to Medium | Medium |
| Use Case | Robotics, industrial, IoT | Hobby projects, simple automation | IoT, wireless applications | Industrial, multimedia |
When to Choose STM32
- Choose STM32: For high-performance robotics, real-time control, or applications requiring extensive peripherals and low power (e.g., autonomous robots, industrial automation).
- Choose Alternatives:
- ATmega: For low-cost, simple hobby projects (e.g., Arduino-based robots).
- ESP32: For IoT applications with built-in Wi-Fi/Bluetooth (e.g., smart home robots).
- PIC32: For applications requiring MIPS architecture or specific Microchip ecosystem support.
Conclusion
Final Thoughts
STM32 microcontrollers are a versatile and powerful choice for RobotOps, offering high performance, rich peripherals, and a robust ecosystem. Their integration with CI/CD pipelines and cloud platforms aligns perfectly with the automation and scalability goals of RobotOps. Whether building autonomous delivery robots or industrial robotic arms, STM32 provides the flexibility and reliability needed for modern robotic systems.
Future Trends
- Edge AI: STM32N6 with Neural-ART accelerators will enable on-device AI for robotics.
- Wireless Connectivity: STM32WB/WL series will drive IoT-enabled robots with Bluetooth and Zigbee.
- Security: Enhanced focus on secure boot and encryption for RobotOps compliance.
Next Steps
- Explore STM32Cube tutorials on STMicroelectronics’ website.
- Join communities like STM32 Community or X groups for peer support.
- Experiment with Nucleo or Discovery boards for hands-on learning.